

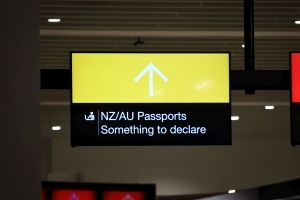
1. Declare, Declare, Declare!
In order to protect the natural environment, New Zealand has some strict biosecurity rules on what you can bring into the country. On your flight to New Zealand, you will be given a Passenger Arrival Card which will ask you whether you are bringing any of the stated “risk items” in New Zealand. Declare these items on your Passenger Arrival Card and to the biosecurity inspectors when you arrive in New Zealand! Failure to do so, even if it’s unintentional, will incur an instant NZ$400 fine and the possibility of your “risk” possession being destroyed or sent for treatment at your expense. So be sure to declare, declare, declare, even if you are unsure! For more information, see What Do You Need to Declare When Arriving in New Zealand?
 © Pixabay
2. Clean Your Hiking & Camping Gear
New Zealand is an outdoorsy country, so no doubt you’ll be packing some hiking shoes and maybe even some camping gear. Any equipment or footwear that has been used outside of urban areas needs to be cleaned of any soil and seeds prior to arrival in New Zealand. Otherwise, you’ll either find yourself having to clean it yourself at the airport or having to pay for your outdoor gear to be sent away for treatment. Ain’t nobody got time for that!
 © Pxhere
3. Arrive with the Right Visa
Depending on your country of origin and what your intentions are in New Zealand, you’re probably going to need some sort of visa. Not everyone can automatically enter the country. So check which visa you need for New Zealand on the Immigration New Zealand website. For more information on the most common types of visas, check out our advice on the Visitor Visa, Working Holiday Visa and Student Visas.
 © Hensleytraveler on Wikipedia
4. There are Some Foods You Can’t Bring into New Zealand
One of those “risk items” that we mentioned above is food. While some food is allowed in New Zealand (just remember to declare all food), some food is prohibited. Save the space in your luggage and the hassle of getting your food confiscated by avoiding packing fresh fruit and vegetables, fresh meat or fish, honey and bee products.
 © Pxhere
5. Get Evidence for Your Prescribed Medication
Taking your prescribed medication is pretty much essential, right? You can bring up to three months worth (or six months if its oral contraception) of prescribed medication into New Zealand as long as you have a copy of your prescription or a letter from your doctor saying that the medication is prescribed to you. The medication needs to be in its original pharmacy container labelled with your name and strength and dosage details.
 © Pixabay
6. Take a Look at the Passenger Arrival Card Before Your Flight
The Passenger Arrival Card that you will be given during your flight to New Zealand is a legal document. That’s why it’s best to get familiar with the Passenger Arrival Card before you set off, so you can fill it out accurately and get a better idea of what you can’t bring into the country. Take a look at this copy of the Passenger Arrival Card and our advice on how to fill it out.
 © NZPocketGuide.com
7. Use the eGate
Auckland, Christchurch, Wellington and Queenstown airports all have eGates which making passing through Passport Control super easy and super fast. You can only pass through an eGate if you have an e-passport from New Zealand, Australia, UK, US, Canada, France, Germany, China, Netherlands and Ireland.
 © Pexels
8. Make Sure All Watersports Gear is Dry
You will need to declare any equipment or clothing associated with water activities, including fishing, scuba diving, swimming, surfing, etc. While you can bring these things into New Zealand if you declare them, they also need to be dry, especially anything that has been in freshwater. If you bring anything that is still damp, biosecurity will likely make you send it for treatment or get it shipped home at your expense.
 © Pexels
9. Have Evidence That You Can Meet Your Visa Conditions
Every visa has conditions that, if broken, will make your visa invalid. The working holiday visa, for example, requires you to be able to financially support yourself for the duration of your stay, as well as have travel insurance. The conditions of your visa can be found on the Immigration New Zealand website, so check them out and print out a copy of bank statements, travel insurance policy, etc. just in case you are asked.
 © Camilo Rueda López on Flickr
10. Pack Absolute Essentials in Your Carry-on
It’s true, there are a few “cheaper” airlines flying to New Zealand that have been known to regularly lose track of luggage. While it’s not likely that you’ll be without your luggage for too long, make sure that you have packed your essentials in your carry-on, such as medication, a spare set of clothes, your wallet, a New Zealand travel adapter with your phone charger, etc.
 © Pixabay
11. Pick the Left Lane
At busy times in New Zealand airports, there is a lot of queuing between Passport Control and Biosecurity. Because most people are right-handed, they have a tendency to pick the right lane. Pick the furthest lane to the left to get through these arrival processes quicker.
 © Pixabay
12. Plan Your Airport Transfer
There are usually a few options for leaving the airport. Do a bit of research, so that you’re not blowing all your money on a taxi on your first day in New Zealand. Check out the bus, shuttle and train options on our Cheapest Airport Transfer Options for Auckland Airport. If you’re renting a vehicle, check if your rental company does a courtesy shuttle to their rental depot.
 © NZPocketGuide.com
13. Customise Your Baggage
In a sea of suitcases and backpacks, picking out your luggage on the baggage carousel can take ages! Make yours easy to spot by making your luggage stand out. Try a colourful luggage belt, bright duct tape around the handles, an eye-catching pin sown onto the front and back…
 © Pixabay
14. Don’t Go Over Your Duty-free Allowance
Going nuts at the duty-free stores can be tempting. However, if you buy too much, you might end up having to pay taxes on them anyway. The duty-free allowances for arriving in New Zealand are 4.5l (152fl oz) of wine or beer and three bottles of spirits or liqueur, each bottle can hold up to 1.125l (38fl oz), 50 cigarettes, 50g (5oz) of tobacco products, 50g (5oz) of cigars, or a mixture of all three, as long as it’s not more than 50g (5oz). You also have to declare if you are bringing more than NZ$700 worth of goods into the country, not including your clothes, jewellery and toiletries. Find out more about duty-free shopping here.
 © Pixabay
15. Adapt to the New Timezone
It’s likely that as soon as you arrive in New Zealand, you’re going to feel tired and jet-lagged. The best way to beat jet lag is to jump straight into the rhythms of your new timezone. Keep active during the day and resist the urge to go to bed at least until 9pm for the first three nights. The rest will be effortless. Find out more ways on How to Beat Jet Lag in Just Three Days.
 © Pexels


If You Liked This Article, Then You Might Like…